
Getting started
This tutorial uses the MySQL classicmodels sample database (offices, employees, customers, orders, orderdetails, products, payments …) — download it from mysqltutorial.org and import it into MySQL / MariaDB — and CodeIgniter 4. The same steps work without a framework, see No framework.
1. Install
Section titled “1. Install”composer create-project codeigniter4/appstarter shopcd shopcomposer require kctofficial/grocery-restableConfigure the database in .env as usual for CodeIgniter:
database.default.hostname = 127.0.0.1database.default.database = classicmodelsdatabase.default.username = rootdatabase.default.password =database.default.DBDriver = MySQLiRecommended: give Grocery Restable its own encryption key for the secrets it stores in SQLite
(php spark grocery-restable:publish prints a fresh one):
groceryrestable.encryptionKey = base64:5KvNDtZtOJcKhY+1d+VQQHC8CE/MH/FcrqSdGrB0ZoI=Nothing else is required: CodeIgniter discovers the Grocery Restable routes (/api/*, /grocery-restable/*),
the groceryRestable service and the grocery-restable:* spark commands automatically.
2. Run the setup wizard
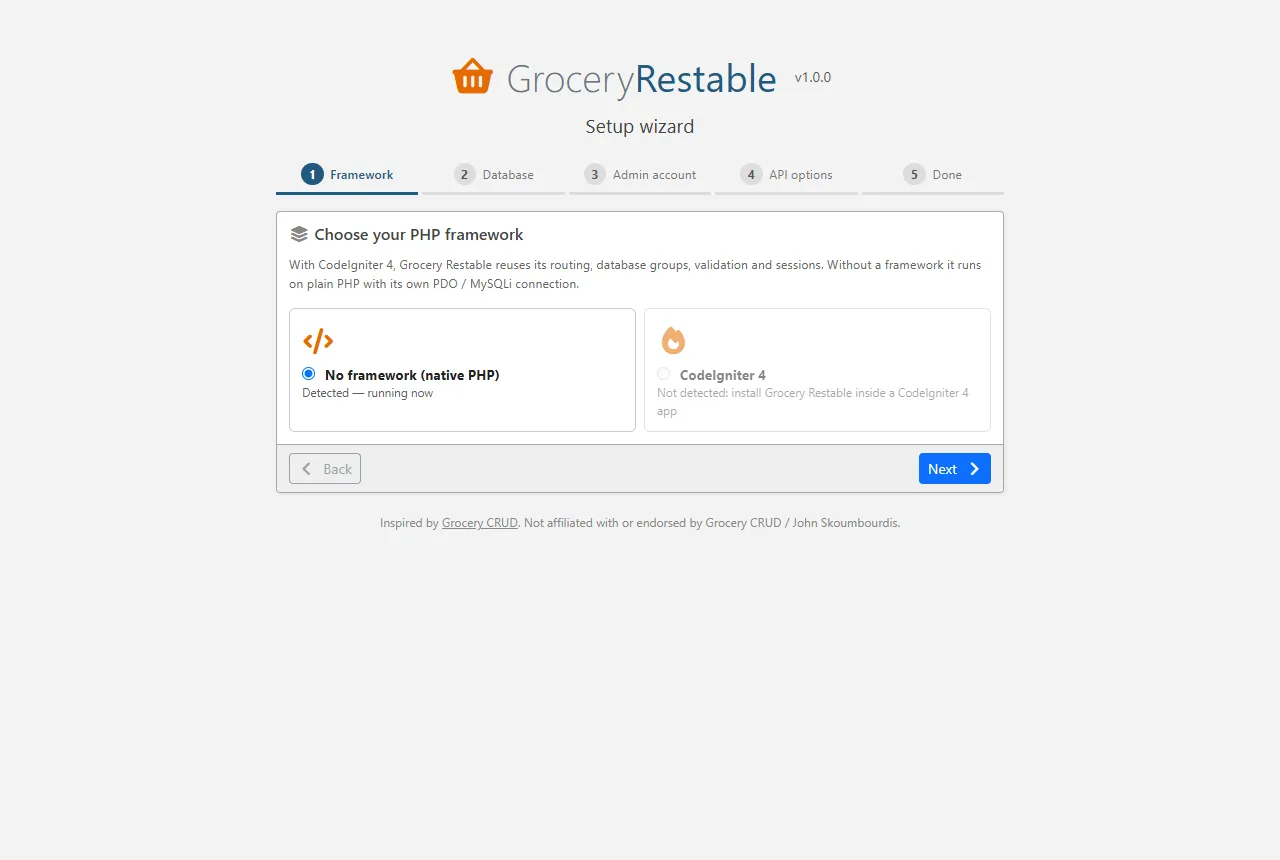
Section titled “2. Run the setup wizard”php spark serveOpen http://localhost:8080/grocery-restable. The wizard asks for:
- Framework — CodeIgniter 4 (detected) or No framework.
- Database — use the CodeIgniter database group, or enter a connection (engine + PHP driver).
- Admin account — the login of this GUI.
- API options — authentication mode and whether to auto expose every table.
At the end two API keys are displayed once: an anon key (public) and a service_role key
(full access, server side only). Store them.
The wizard is only reachable from
127.0.0.1/::1unless you setsetupToken. On a remote server usephp spark grocery-restable:setupinstead. See Security.
3. Call the API
Section titled “3. Call the API”With auto expose enabled every table is already an endpoint:
KEY=gr_xxxxxxxx   # the service_role key
curl "http://localhost:8080/api/offices" -H "apikey: $KEY"curl "http://localhost:8080/api/products?select=productName,buyPrice&buyPrice=gt.100&order=buyPrice.desc&limit=5" -H "apikey: $KEY"curl "http://localhost:8080/api/orders?status=in.(Shipped,Resolved)&count=exact&limit=1" -H "apikey: $KEY" -i
4. Shape a resource in code
Section titled “4. Shape a resource in code”Auto expose already detected the relations from the foreign keys of classicmodels. Defining a resource in code lets you name relations, choose titles, add validation, uploads and permissions — like in Grocery CRUD. For the upload example add a column first:
ALTER TABLE employees ADD photo VARCHAR(255) NULL;Publish the config and edit define():
php spark grocery-restable:publishpublic function define(\GroceryRestable\GroceryRestable $api): void{ $api->resource('employees') ->setSubject('Employee') ->setRelation('officeCode', 'offices', '{city} ({country})') ->setRelationHasMany('customers', 'customers', 'salesRepEmployeeNumber', 'customerName') ->displayAs('officeCode', 'Office') ->requiredFields('lastName', 'email') ->setRules('email', 'required|valid_email') ->setFieldUpload('photo', 'employees', 'jpg|png|webp') ->setPermissions('anon', ['select']);
// orderdetails is the junction table between orders and products $api->resource('orders') ->setRelation('customerNumber', 'customers', '{customerName} ({country})', null, null, 'customer') ->setRelationNtoN('products', 'orderdetails', 'products', 'orderNumber', 'productCode', 'productName', 'orderLineNumber') ->unsetDelete();}# Embed the office (belongs_to) and the customers (has_many)curl "http://localhost:8080/api/employees?select=lastName,offices(city),customers(customerName)&limit=3"
# An order with its customer (belongs_to) and its products (many_to_many through orderdetails, in line order)curl "http://localhost:8080/api/orders/10100?select=orderNumber,status,customer(customerName),products(productName)" -H "apikey: $KEY"
# Orders of French customerscurl "http://localhost:8080/api/orders?select=orderNumber,customer(customerName)&customer.country=eq.France&limit=5" -H "apikey: $KEY"
# Create with validation (employeeNumber is not auto-increment in classicmodels)curl -X POST "http://localhost:8080/api/employees" -H "apikey: $KEY" -H "Content-Type: application/json" \ -d '{"employeeNumber":1800,"lastName":"Doe","firstName":"Jane","email":"jane@example.com","extension":"x1","officeCode":"1","jobTitle":"Sales Rep"}'
# Upload a file into a fieldcurl -X POST "http://localhost:8080/api/employees/1800/upload/photo" -H "apikey: $KEY" -F "file=@me.png"Writing many-to-many links (
{"products": ["S10_1678", "S10_1949"]}) inserts junction rows with only the two key columns, so it works for junction tables whose other columns are nullable or have defaults.orderdetailsrequires quantity and price (such a write returns409 constraint_violation), so manage its rows through anorderdetailsresource instead.
5. Or shape it in the GUI
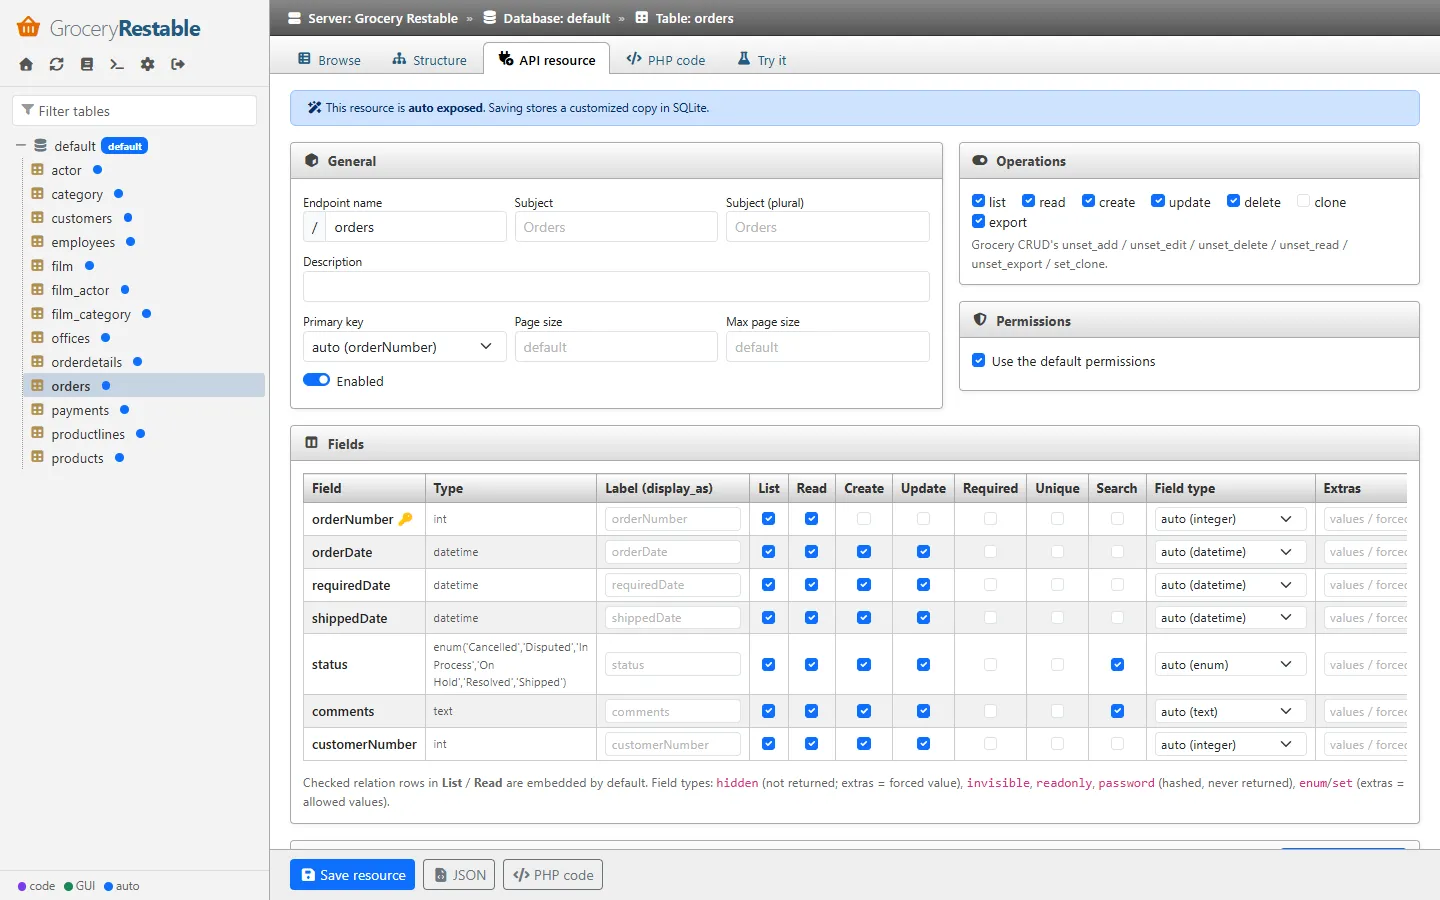
Section titled “5. Or shape it in the GUI”Select a table in the left navigation and open API resource: tick the columns that are listed / readable / writable, add labels, rules and field types, add relations with the relation editor, configure uploads, permissions, default conditions and order. Save stores the definition in SQLite and it is live immediately. PHP code shows the equivalent fluent code if you later want to move it into your application.
6. Next steps
Section titled “6. Next steps”- Lock down access: Authentication
- Learn the full query language: REST API reference
- Browse every resource option: Resources
- Production checklist: Security